
 150
150
Background
The Shelter Bed Reservation System is a centralized system where available shelter beds can be accessed by families experiencing literal homelessness. The shelter providers role within the Bed Reservation System it to provide a safe, temporary place for families with children and to help families enter as quickly as possible by not putting up unnecessary barriers that keep families in need from entering shelter. To learn more about the Bed Reservation process for Shelter Providers, follow the steps below.
Within this Article
- Opening Shelter Opportunities
- Editing Shelter Opportunities
- Review a Pending Referral
- Denying a Referral
- Accepting a Referral
- Shelter Exits
Opening Shelter Opportunities
Each shelter provider is responsible for entering and updating any shelter opportunity at their agency.
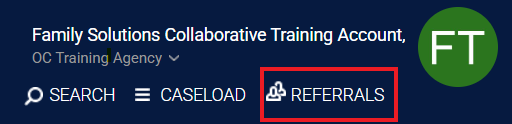
Step 1: Ensure the shelter provider agency tab is the one the opportunity will be posted in the Agency drop-down below your name then click on the Referrals tab.
*Please note: Anything to do with accepting a match, reviewing a match, or denying a match will be done under the shelter provider agency tab in HMIS
Step 2: Within the Referrals tab, select on Availability then on Bed Reservation. A list of all the projects for your agency will appear. Select Limited Availability for the shelter project you are opening. Then, click on the drop-down button next to the shelter project. You will have the options to add a single opening or multiple openings. Please note: Do not set any project to Full Availability because openings for the project will not appear on the FCES Bed Reservation Available Shelter Opportunities Report. Also, if you select on multiple openings, all openings will be the same so if you have multiple openings to post with different criteria, add them as single openings.

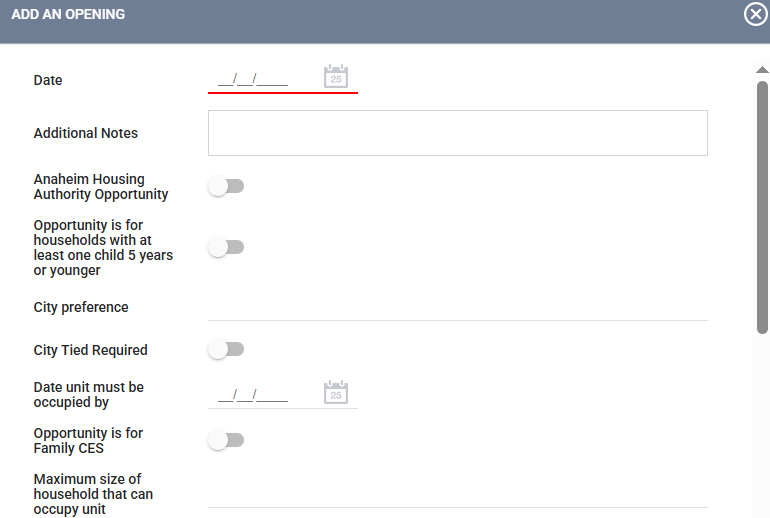
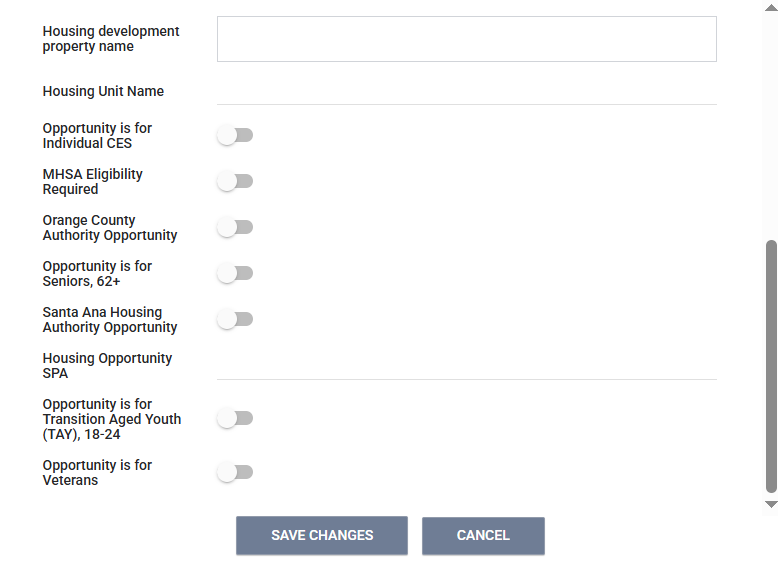
Step 3: After selecting if you would like to add a single opportunity or multiple opportunities, complete the following information in the pop-up window.
- Date: The date the opening became available.
- Additional Notes: Enter any criteria specific for the unit such as the minimum household size that can occupy the unit or anything important the matchmaker should know about the unit. Ex: It is an upstairs unit
- Opportunity is for households with at least one child 5 years or younger: If the project is required to serve a household with a child under the age of 6 for the unit, toggle the box.
- City Preference: If the project receives funding that prefers to serve clients from a specific city, enter the name of the city.
- Opportunity is for Family CES: Push the toggle so the opportunity is matched through the Family Coordinated Entry System
- Maximum size of household that can occupy unit: Enter the largest number of household members that can occupy the unit.
- Click on Save Changes
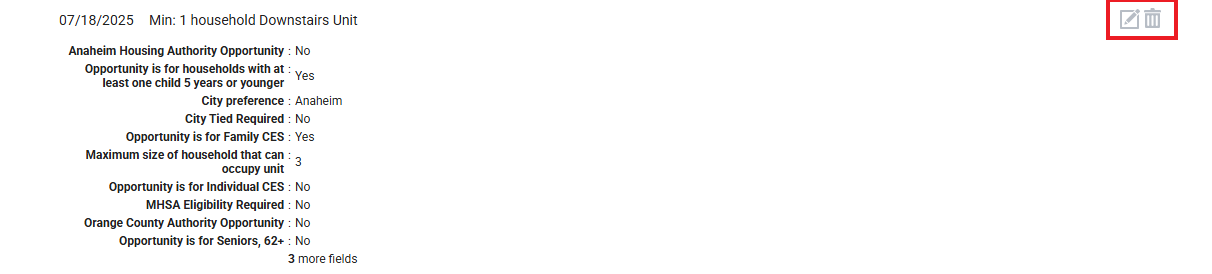
Editing Shelter Opportunities
Once a shelter opportunity has been created, the opportunity can be edited or deleted on the Availability tab of the referrals page by clicking on the drop-down for the project, and clicking on the Edit or Delete buttons next to the shelter opportunity.
Reviewing a Pending Referral
Once a matchmaker has matched a household to a shelter opportunity, the FCES team will email the shelter provider and access point notifying them of the match. The shelter provider will then review the match and determine eligibility. The shelter provider will contact the household within 24 hours of receiving a match.
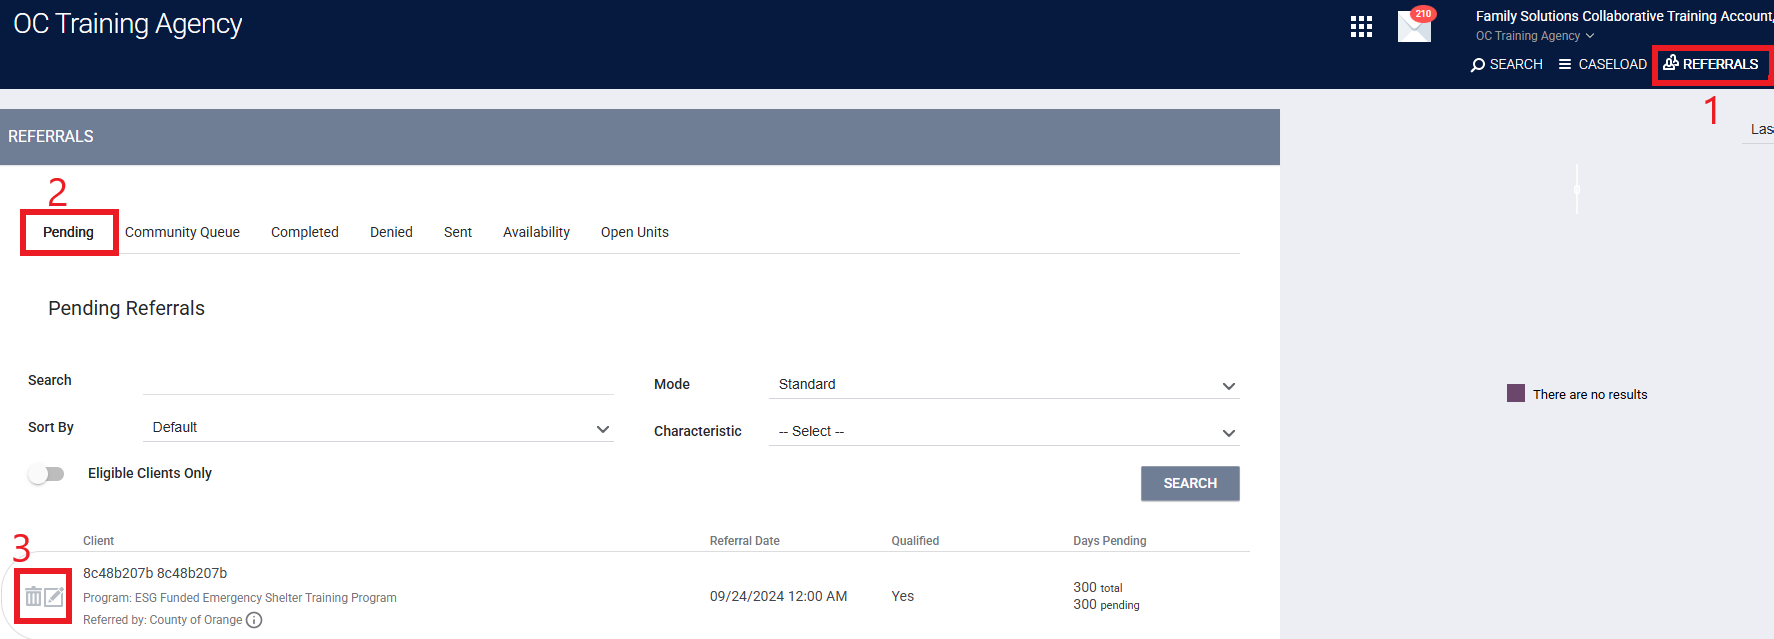
Step 1: To review any pending referrals, select the Referrals tab under your name.
Step 2: Select the Pending tab. This will show you all the households that have a match pending with your agency. Click on edit next to the name of the household you are reviewing.
Step 3: The status of the referral can be updated here to pending- in process once the shelter provider has attempted their initial contact attempt.
- If the household does not answer, the shelter provider will leave them a detailed message with their call back information and inform the Access Point that they have not been able to reach the client and ask for assistance.
- If there has been no response within 24 hours after the first attempt to contact the family, the shelter provider can deny the match in HMIS.
Denying a Referral
The household matched may need to be denied due to not being eligible, the household decided not to move forward with the project, or there was no contact established. The FCES team can only send a new match once the referral has been denied in HMIS.
Step 1: Within the Referrals tab, select on Pending then click on edit next to the household you will be denying.
Step 2: Scroll down to the Status sections and select the denied option in the drop down. Once you have selected on the denied option, additional questions will appear and you will need to complete those as well.
- Send to Community Queue
- Yes: Selecting Yes means the household will be sent back to the Community Queue and they can be matched to another shelter opportunity.
- No: Selecting No means the household will not be sent back to the CQ and will not be rematched to another shelter opportunity. This should only be selecting if the household decides they no longer need shelter services through CES or if contact was not established.
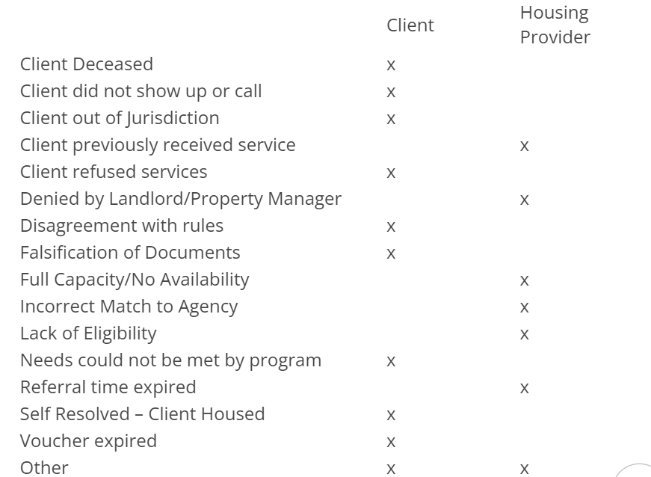
- Denied by Type: You will select whose decision it was to deny the referrals whether it was the provider or the client.
- Denied Reason: You will select a reason for denial from the drop-down menu below.
Accepting a Referral
Once the shelter provider has determined the household is eligible for their project, the case manager will enroll the household into the shelter project.
Step 1: Within the Programs tab of the household you are enrolling, click on the down arrow next to the shelter project the household was referred to.

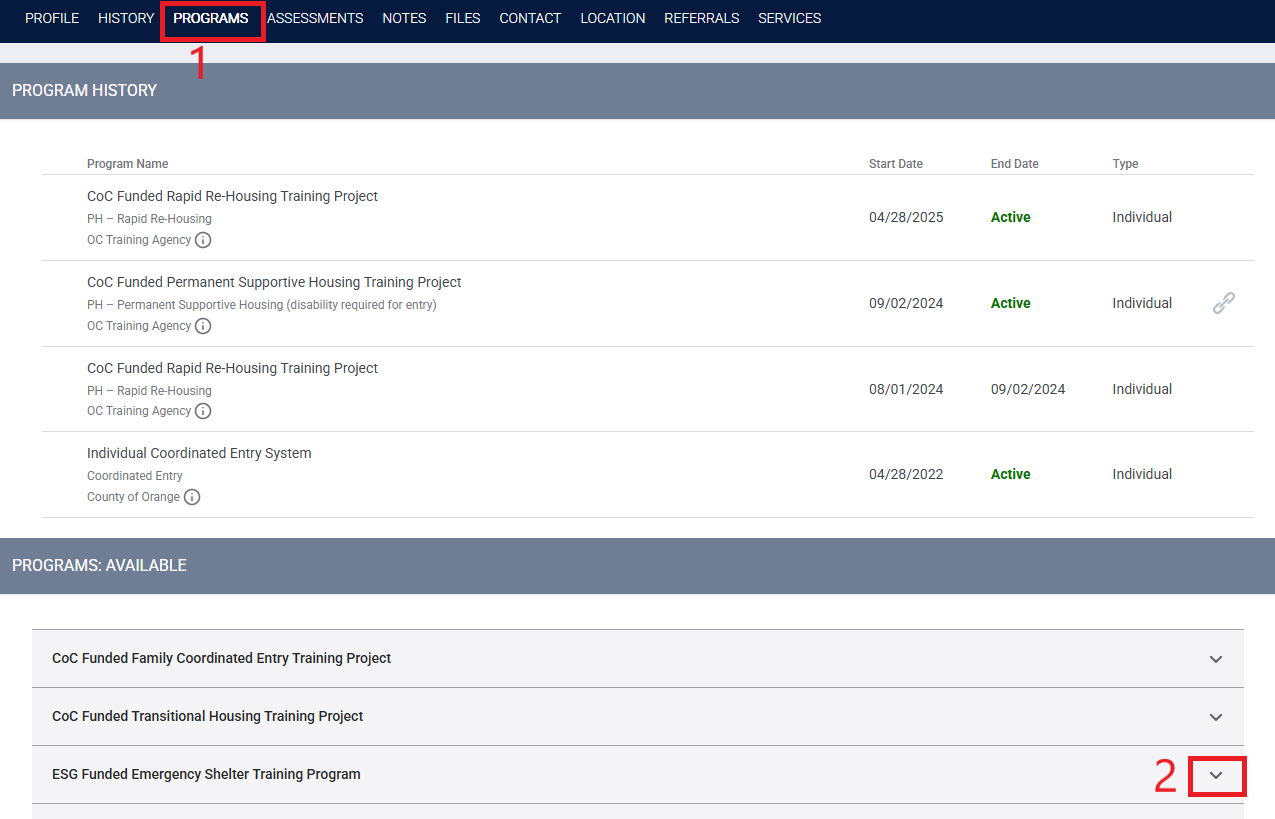
Step 2: A section will expand and additional information will appear.
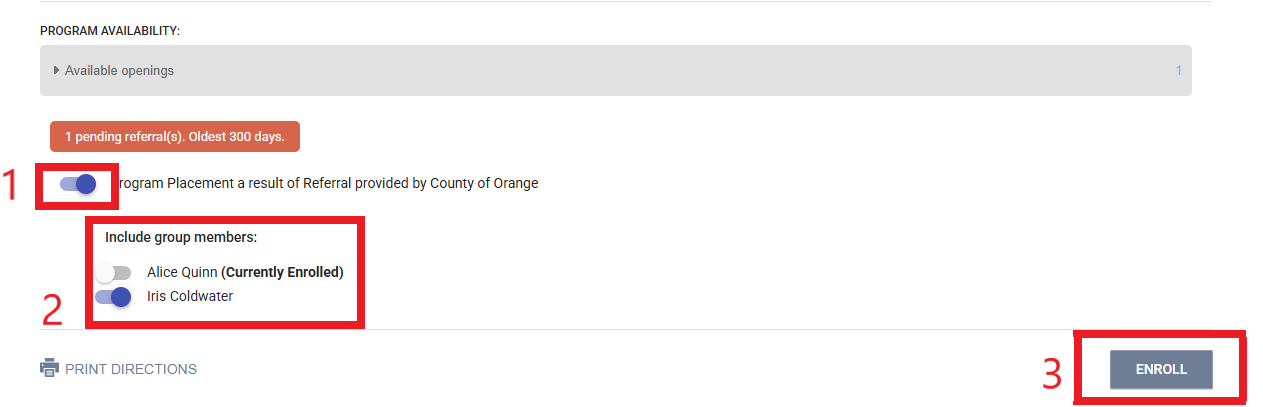
- Program placement as a result of referral provided by County of Orange: This section will appear if there was a referral through the Bed Reservation Community Queue. This will only appear on the HoH. Toggle next to it to select the project.
- Include group members: Include all household members that are enrolling into the project with the HoH.
- Click on enroll and complete the enrollment. The enrollment date will be the date they began occupying the unit.
Step 3: Once the household is enrolled, the shelter provider will update the following in FCES as they will now become the clients Access Point for CES.
- Update the Assigned staff within the FCES project
- Update the Access Point within the enrollment page of the HoH
- Complete a new current living situation
- Upload a 3rd party verification of homelessness
Shelter Exit
Households may need to exit from the shelter project for reasons such as completing the program, self-resolving, asked to exit, etc.
- If a family is asked to exit the shelter and they are still in need of services through FCES because they will remain literally homeless, the shelter provider will connect the family to an Open Family Access Point based on the city the family will reside in after the exit. This can be their own access point.
- If they are no longer in need of services, they should be exited from FCES.
- If the family exits from the shelter due to self-resolving, the shelter provider will exit the family from FCES.
- Self-resolving: Staying with family/friends, rental by client, etc.
If the family was matched to a housing opportunity through FCES, the shelter provider will not exit the family from FCES as this is the responsibility of the housing provider. The Access Point should review the Exiting Households from FCES knowledge base article for instructions on how to exit a household.

